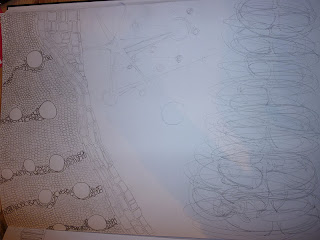
I feel like I have been drawing and applying a similar consideration in my metal experiments too:
 |
| aluminium: domed, punched front and back, antiquing fluid applied |
 |
| brass: punched front and back, antiquing fluid applied |
I've also been looking about for some inspiration and stumbled across all of these!!!
 |
| I should buy this - it's great! |
 |
| exciting work by Hilary Bower |
 |
| 'found drawings' by jazz green - I should start doing this myself! |
 |
| some lovely marks by Lydia Wooldridge |
 | |||||
| Grayson Perry 'lassoing thoughts with this pen'! (some great words in the article too!) |
 |
| * incredible * mixed media work by Julia Westerbeke |
 |
| exciting marks by Michelle Lusby |
 |
| interesting print and design process by Frances Hawkey |
 |
| and this hairnet by Anne Allen is lovely! |
Doodling
Lay some large sheets of paper (A2 or A3)and sketchbook on a table. You can also use the back of wrapping paper, or lining paper.
Have pencils, pens, biros, charcoal and felt tips readily to hand.
Free your mind and make as many possible marks as your hand will let you: let it trail across the paper slowly or use fast movements to give strong bold marks such as dashes, long wavy lines, dots and circles. Be inventive. Don’t attempt to draw anything in particular. Just try to become involved in the lines, dots and different kinds of shading which each medium will produce.
Now think of a subject such as water, flowers, buildings, patterns of light or even a recent dream. Allow the subject to influence the marks you are making but do not try too hard to resolve any particular image.
Repeat these processes several times to give yourself time to relax into this piece of work. Get used to making many different types of marks. Time invested in this simple exercise is invaluable as your small doodles will grow into bigger ideas and more confident sketches.
Making marks like this is like practicing handwriting. Once you are confident about what each medium will do you are on your way to using them to describe things you see or imagine.
Mark-making techniques
Techniques associated with linear mark-making can be endless from pencil line to solid areas of tone built up by shading. It is a good idea to make notes about the materials and techniques you have used next to your doodles or sketches.
What you will need:
• A variety of graphite pencils, drawing pens, biros, felt tips, thick and thin sticks of charcoal – the
thicker, chunkier sticks are more versatile and less prone to breaking
• Large sheets of white cartridge paper
• Sketchbook
What to do:
Draw lots of 5cm squares using a variety of graphite pencils, drawing pens, biros, felt tips, thick and thin sticks of charcoal – the thicker, chunkier sticks are more versatile and less prone to breaking. Use a different technique with a different medium inside each square.
Experiment with other techniques such as hatching to indicate shape and form. Hatching is a form of shading made by drawing parallel lines close together so that they create a tonal effect. The lines may be thin or thick and they can be drawn carefully or freely. Practise hatching on a piece of scrap paper. Slant the lines at an angle which suits you. Draw freely. The lines shouldn't be ruler-straight and it doesn't matter if they sometimes touch.
Try hatching with coloured pencils to add areas of colour which suggest form and volume.
Compare the techniques and media you’ve used. Which work well, which don’t? (For example, it is unlikely that cross hatching is either easy or effective using a thick charcoal stick, while a fine pen is great for this kind of mark making). Make notes on your thoughts and discoveries.
Think I'll be having a go at both of them!


No comments:
Post a Comment